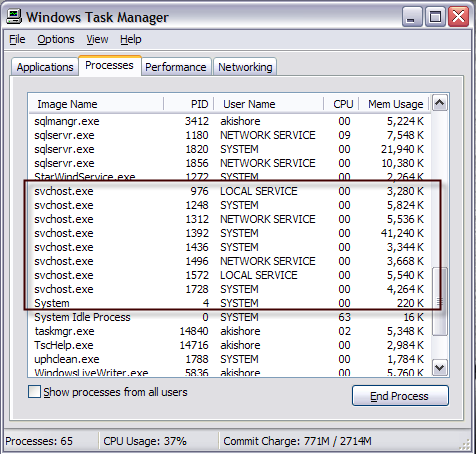
So before we dive into solutions, let’s get a deeper understanding of what this process actually does and how you can go about fixing some of the problems that might occur. Firstly, svchost stands for “Service Host” and it does exactly what as the name suggest: helps to “host” services. A service in Windows is simply a program in the operating system that does a particular job and runs in the background at all times when your computer is on, even if you are not logged in. Most programs that you are familiar with run as a stand-alone executable, such .EXE. However, most services are implemented in the form of DLLs, which cannot run on their own. Hence, svchost loads those DLLs and runs them itself. That’s why when you open the Windows Task Manager, you’ll see a bunch of svchost.exe processes running. If you want more info on the Task Manger, check out my articles on understanding the Task Manager.
You’ll notice that there are currently eight svchost processes running on my computer, all using up various amounts of memory and running under different user names. So let’s say one of them is running at an excessively high CPU usage of 100 percent, how can we identify the actual application running? There are actually two ways to go about this: doing it all manually using the command prompt and Services tool or by using a third party application. I’m going to mention both here in case one does not work for you.
Check for Viruses First
Before we get into the details below, it’s worth noting that there are cases where svchost.exe is actually a virus. Since it’s a system process, malicious coders like to use the name svchost to remain hidden. If the file is located in Windows/system32, it’s more than likely not a virus, however I always recommend performing a scan just to be sure. If you don’t already have an anti-virus program, I recommend using either Kaspersky or Bitdefender since they consistently perform at the top in AV-Test and AV-Comparatives rankings. They are not free, but most free antivirus programs end up bundling extra junk software or redirecting your browser to their “secure” search solution, which isn’t secure at all and just tracks you and shows you more ads.
Identify svchost.exe Processes via Command Prompt (hard way)
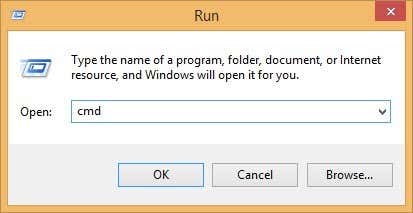
First, go ahead and click on Start and then Run and type in CMD and click OK. In Windows 8.1, go ahead and right-click on the Start button and choose Run.
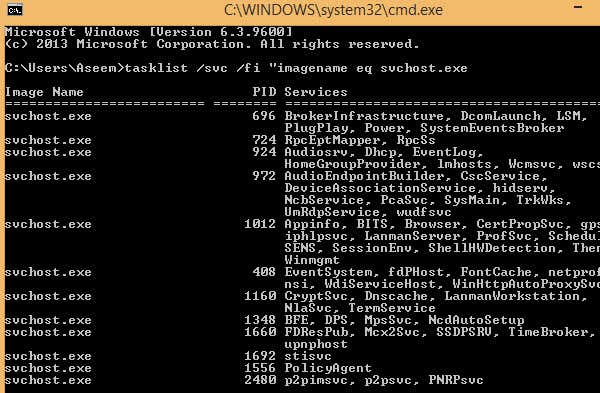
Type in the following into the command window and press Enter tasklist /svc /fi “imagename eq svchost.exe You should get an output as shown below with the name, PID, and service description
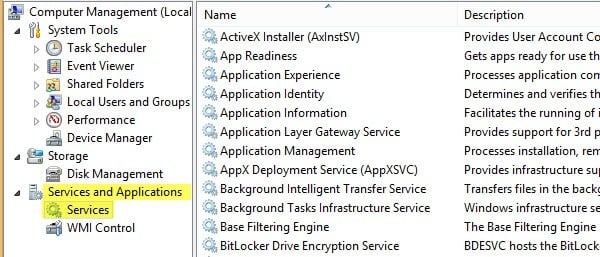
You’ll now see each svchost process along with it’s unique ID number and the services it is responsible for running. However, these names are still very cryptic and are all short-hand names. In order to get some more useful information about the process, we can use the Services browser in Windows. 3. Right-click on My Computer, choose Manage. On the resulting screen, choose Computer Management and then choose Services and Applications. Finally, choose Services.
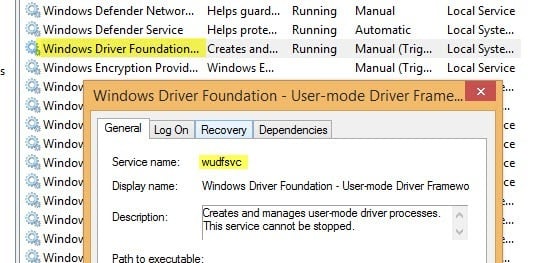
- Now try to match the cryptic Windows service name with the easily readable names in the Services tab. This is a little and can take some time because if you take the process with ID 1436 and it’s name WudfSvc, you have to try to find it in the list. If you double-click on one the service names, you’ll see their cryptic name also, so that’s how you can match them up. In my case, I guessed that the W means the process starts with “Windows” and opened them until I saw a match.
As you can see, the Windows Driver Foundation service is actually called wudfsvc for short!
Identify svchost.exe Processes via Process Explorer (easy way)
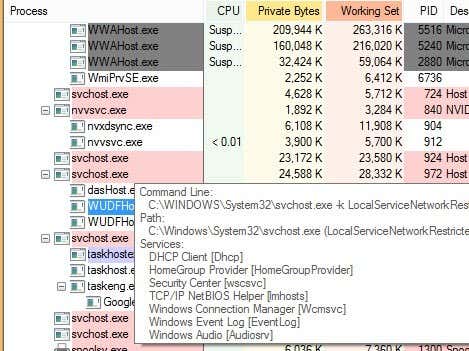
If you found to be too difficult, there is a much easier way! Check out the Process Explorer tool from Microsoft (originally from SysInternals). The tool is completely free and gives you detailed information for each process currently running. Once you download it, just run the exe file as it does not have to be installed. Hover your mouse over the svchost process and you’ll get a popup showing you which services are running under that process. The nice thing about process explorer is that it gets you the friendly name for each process instead of the short name.
Windows 8 Task Manager
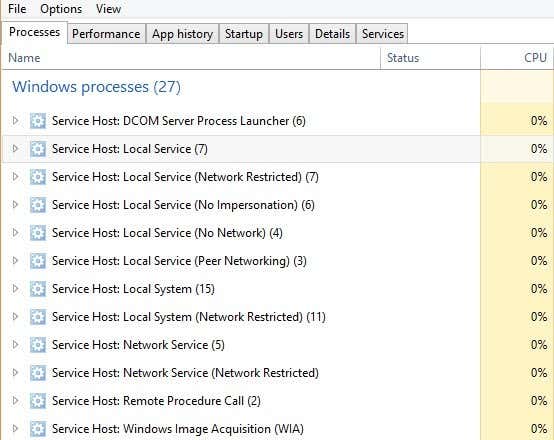
One last thing I wanted to mention was the fact that the Windows 8 task manager basically makes using the command line or Process Explorer totally obsolete. Open the Task Manager by pressing CTRL + SHIFT + ESC and scroll down on the Processes tab to where it says Windows Processes.
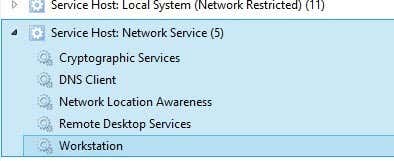
Here you will see every svchost.exe process listed as Service Host: followed by the type of account it is running under (Local System, Network Service, etc). It’ll also have a number next to it and if you expand the item out by clicking the arrow, you will also see every service running under that particular process.
Fixing SVCHOST High CPU Usage
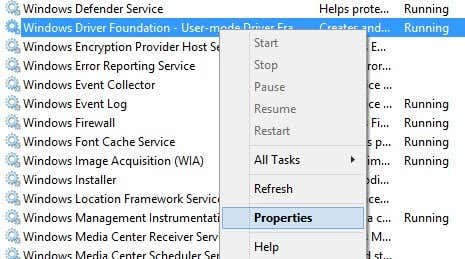
Now that you have figured out exactly which process is eating up all of your CPU, we can address how to fix it. If you have found that the process is not a Windows process, such as Windows Update or Windows Firewall, etc, then simply kill the process and uninstall the program. However, most of the time that this problem occurs, it has something to do with a Windows process. The best solution in this case is to install all of the latest updates from Microsoft’s web site. If you’re not able to do so normally in Windows, try restarting the computer in safe mode and try it again. Also, if you can get to the Services tab like we did above, go ahead and right-click on the service and choose Disable. Even if it’s Windows Update or the Firewall, don’t worry, you can re-enable it later. Then restart the computer and go to Microsoft’s web site and manually get the updates. Re-enable the service and restart the computer again and hopefully things are working! In order to disable a service in Windows, right-click on it from the Services tab and choose Properties.
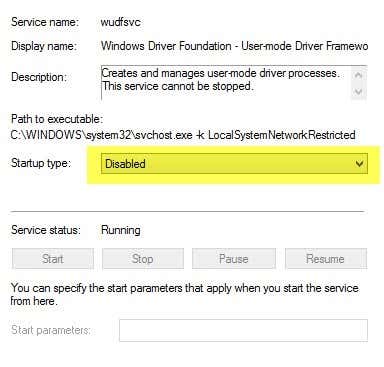
Next choose Disabled from the Startup type combo box located in the middle of the dialog box:
I have gone through this process a couple of times and it has worked for me. So again, first disable the service, then restart computer, then install updates manually, then re-enable service, and then restart computer again. If this doesn’t work, you have to perform a repair install of Windows. Do a Google search for repair install and follow the steps. If you’re running Windows 8, you can refresh your computer. If you have any questions, post a comment. Enjoy!
